At North Sydney Plunge Pools, we have helped homeowners across the region transform their spaces into beautiful outdoor havens. Our licensed team manages everything from soil checks to safety inspections, making sure your plunge pool is installed properly and ready for use.
This guide explains each installation stage from the first site check to your first refreshing cold dip, so you will know exactly what to expect.
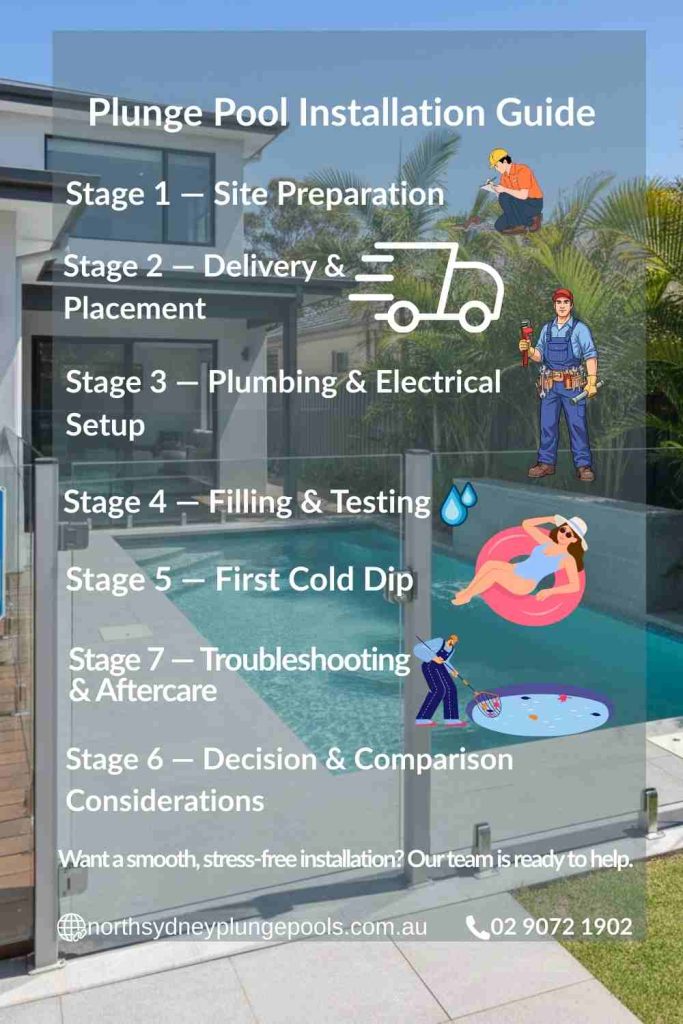
Stage 1: Site Preparation
Choose a level area with good drainage, sunlight, and easy crane access. Keep the spot close to water and power but away from trees or pipes.
Your installer removes debris, checks the soil, and creates a stable base of compacted gravel or concrete. A pre-installation inspection confirms soil stability, access clearance, and compliance with Sydney Council standards before delivery day.
Typical cost: $800 to $2,000 for site levelling and base setup.
Duration: 1 to 2 days.
Before choosing the location near water lines and power access, use this pre-install plunge pool checklist for homeowners to avoid costly site mistakes.
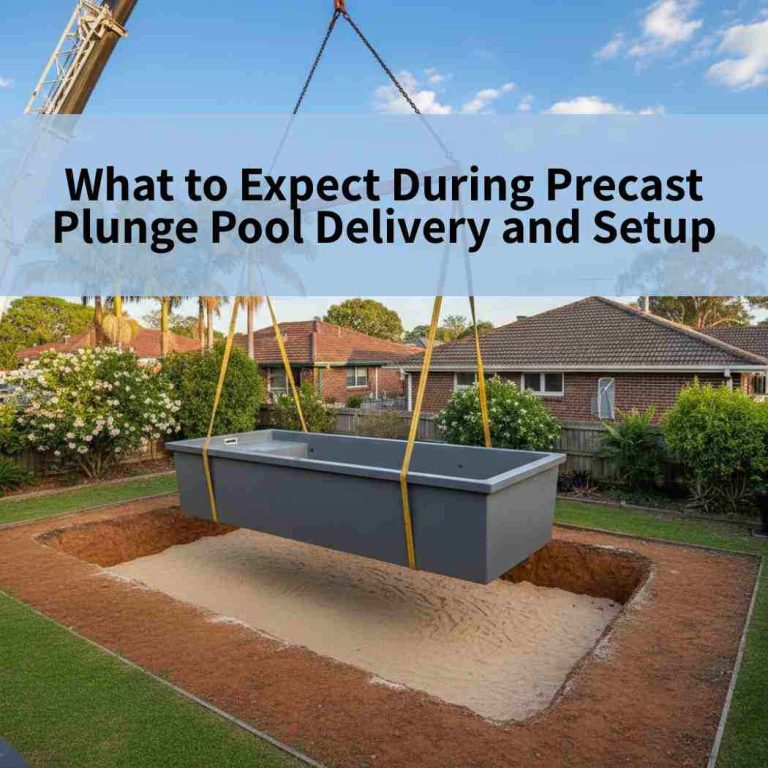
Stage 2: Delivery & Placement
On delivery day, the plunge pool shell arrives and is lifted into place with a crane or trolley. The installer ensures the shell is flat, secure, and aligned with plumbing points and skimmer boxes. Protective mats stop scratches or pressure damage during placement.
Typical cost: $500 to $1,200 for crane or equipment hire.
Duration: half a day to 1 day.
Stage 3: Plumbing & Electrical Setup
This stage links your pool to its filtration, drainage, and lighting systems. Licensed tradespeople handle plumbing lines and electrical connections following NSW safety standards. A GFCI safety switch outlet prevents electrical shocks, while plumbing lines are pressure-tested for leaks.
Typical cost: $1,000 to $2,500, depending on system complexity.
Duration: 1 to 2 days.
Stage 4: Filling & Testing
After connections are secure, fill the plunge pool slowly while checking for leaks. Once full, run the filtration system and test the water’s pH, alkalinity, and chlorine levels using a test kit. Adjust the temperature if you have a cooling or heating unit.
Typical cost: $150 to $300 for water and start-up chemicals.
Duration: 4 to 6 hours.
Stage 5: First Cold Dip
Before swimming, confirm that electrical and plumbing systems have passed safety checks. Begin with short dips, around 30 seconds to 2 minutes, to let your body adapt. Cold-water therapy helps with recovery, circulation, and stress relief.
Breathe slowly, exit if light-headed, and warm up afterwards.
Stage 6: Decision & Comparison Considerations
Decide between an indoor or outdoor plunge pool. Outdoor pools are ideal for open yards, while indoor pools need ventilation and waterproofing.
DIY installation can save $3,000 to $5,000 in labour but may risk compliance issues. Professional installation ensures warranty coverage, correct setup, and long-term reliability.
Stage 7: Troubleshooting & Aftercare
Keep your plunge pool in top shape with simple weekly care:
- Test and balance water chemistry
- Empty skimmer baskets
- Clean or backwash filters
- Cover the pool during winter
If you notice weak water flow or drops in temperature, check the pump and filter for blockages.
Maintenance cost: $25 to $50 per month for chemicals and cleaning.
Full water change: every 3 to 4 months.
If you’re still budgeting for excavation, permits, and equipment, plunge pool cost in Sydney explains realistic price ranges based on materials and site conditions.
Conclusion
From preparation to your first dip, installing a plunge pool is a rewarding project that adds comfort and value to your home. With the right planning and guidance, you’ll enjoy cool, refreshing moments all year round.
To keep your installation smooth, safe, and stress-free, we, as the leading plunge pool company in North Sydney can guide you from planning to final handover.
Ready to start your project? Call North Sydney Plunge Pools today or visit our website to book your free site check and take the first step toward your dream plunge pool.
FAQs
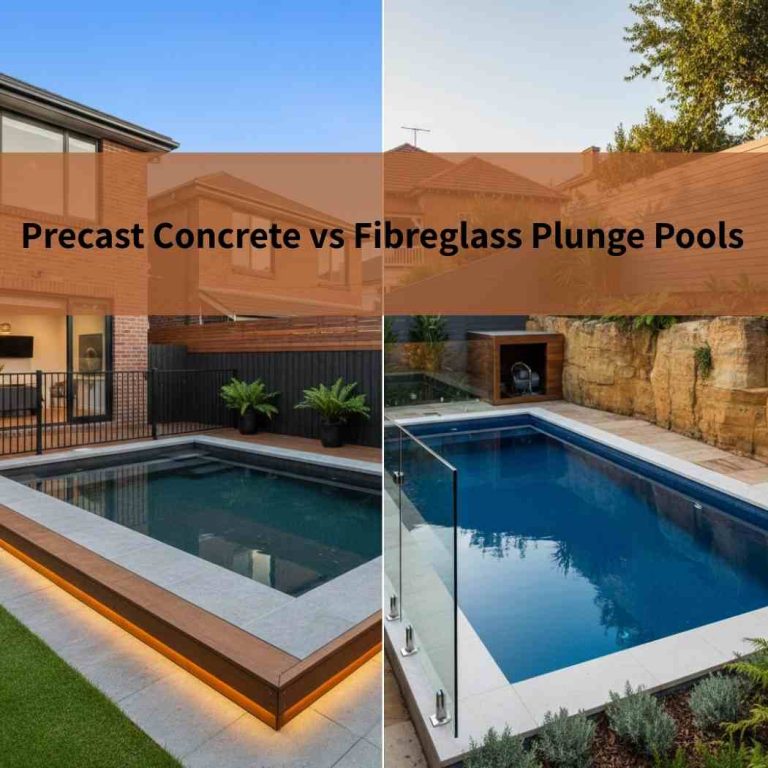
What type of base or foundation is best for different plunge pool materials (fibreglass vs concrete)?
Fibreglass pools need a compacted gravel base or reinforced concrete pad for even support, costing about $800 to $2,000. Concrete plunge pools are built on-site, so their base is poured as part of the structure.
Are there noise or vibration considerations when installing plunge pool pumps or chillers near homes?
Yes. Place pumps and chillers away from living spaces. Use rubber pads or acoustic boxes to cut vibration and noise. Regular maintenance also keeps motors running quietly.
What is the best season to install a plunge pool in Sydney?
Late spring or early autumn is ideal because the weather is dry and mild, helping with excavation and curing. Avoid the wet season to prevent soil delays
How can homeowners prepare their property for crane access?
Clear the driveway and yard, move fences or vehicles if needed, and tell neighbours about access. Installers usually do a pre-site inspection to plan a safe crane route.
What maintenance costs should I expect in the first year?
Expect about $300 to $600 for cleaning, water testing, and filter upkeep. Annual servicing ensures long-term performance and equipment warranty protection.